If you've heard of our video templates but you're wondering whether they can benefit you and how to use them for yourself then this is the blog for you.
We'll be showing you exactly where to find our templates, why you'd be crazy not to use them and how to edit them to suit your needs in 3 easy steps.
1. What are VideoScribe video templates?
2. What are the benefits of using our video templates?
3. Which is the right template for you?
4. How to customize video templates in VideoScribe in 3 simple steps
So let's get started - what exactly are the VideoScribe video templates?
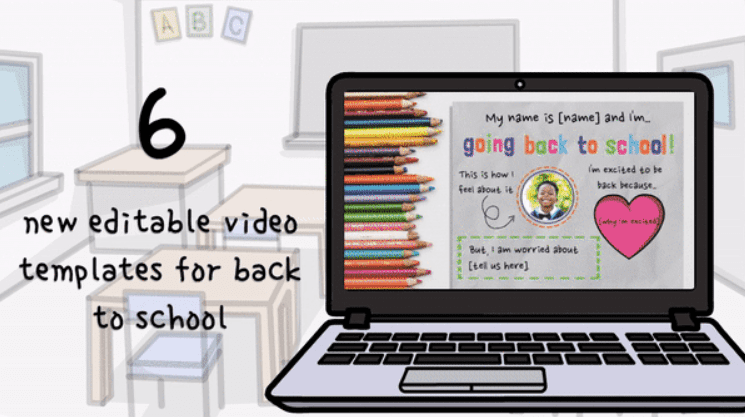
Simply put they're short pre-made VideoScribe animations created by our talented team of animators. They're designed to help you easily and quickly create stand out video content by providing you with a template to edit, rather than starting from a blank canvas. You can find a wide range of pre-made video templates. They cover everything from education and back to school, to marketing and holidays like Halloween.
Open the Templates tab from the home screen to preview and choose templates:

To check out our current range of templates, either log in to your VideoScribe and click the 'Templates' tab on the home screen or start a free 7-day trial by clicking the button below.
The benefits of using our video templates
Now you know how to find them, here's why using our video templates is a no brainer!
1. They save you time
We're all busy juggling lots of responsibilities, especially right now in these uncertain times which means your time is more precious than ever. Helping you create effective videos quickly and easily has always been one of our main priorities and templates really just go the extra step.
Instead of starting with a blank canvas, we've done the hard work for you and our templates set the scene for you to add the final magic touches. Our simplest templates can be edited and rendered within just 10 minutes leaving you more time to tackle your to-do list or have a well deserved coffee break! 😌
2. They help you create more polished videos
Since each of our templates are designed by our team of professional animators, you're actually starting with a much higher quality video. With this foundation it's even easier to create really slick videos that'll impress your colleagues, customers and friends.
3. They're reusable, shareable and flexible
Plus, our templates can be adapted in as many different ways as you need, as many times as you need. They're the ultimate flexible tool to give you a helping hand.
Spot the difference!
.gif?width=388&name=ezgif.com-gif-maker%20(52).gif)
-1.gif?width=390&name=ezgif.com-video-to-gif%20(92)-1.gif)
To prove just how much of a difference our templates make, here you can see our Halloween template on the right-hand side compared to the same imagery unedited on the left. Clearly the overall effect of the template is much more striking with the custom background and animated bats. But it's also in the details, some elements fade in and others are drawn, we've adapted the colors of the tombstones to create silhouettes and added extra messaging over one of them.
It's these small but effective changes that can take the time, which is why we've done them for you 😎
How to pick the right template for your content and needs
Now you know just how much our templates can benefit you, you're probably wondering how you can get started. The first step is choosing the right template. Bear in mind that you can fully edit the content of the template so what's most important is picking a template with the right structure for your video.
Our templates are each structured in one of three main ways that you can see below. Different structures are great for different topics. For instance if you're discussing a time based topic like what lessons will be taught over the coming semester or the impact your services have over time then a process structure is perfect.
Whereas explainer videos would benefit from a mind map or collage structure where ideas can be layered building up a full picture of the problem/solution. So keep this in mind when you're choosing a template and focus on the flow of the animation as this would be harder to change than the text and images.
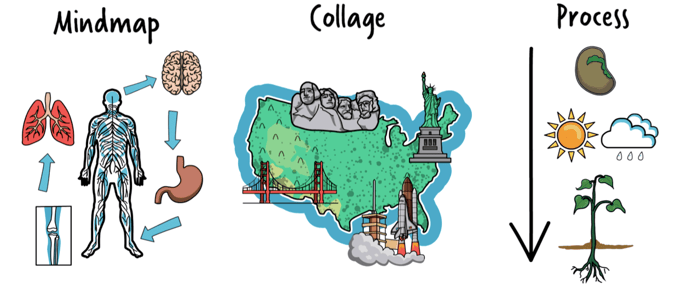
3 simple and easy steps to customize our video templates
Once you've picked a template to use you can move on to the fun part - editing! This is where your video starts to take shape and you can put your own stamp on it.
1. Edit the text
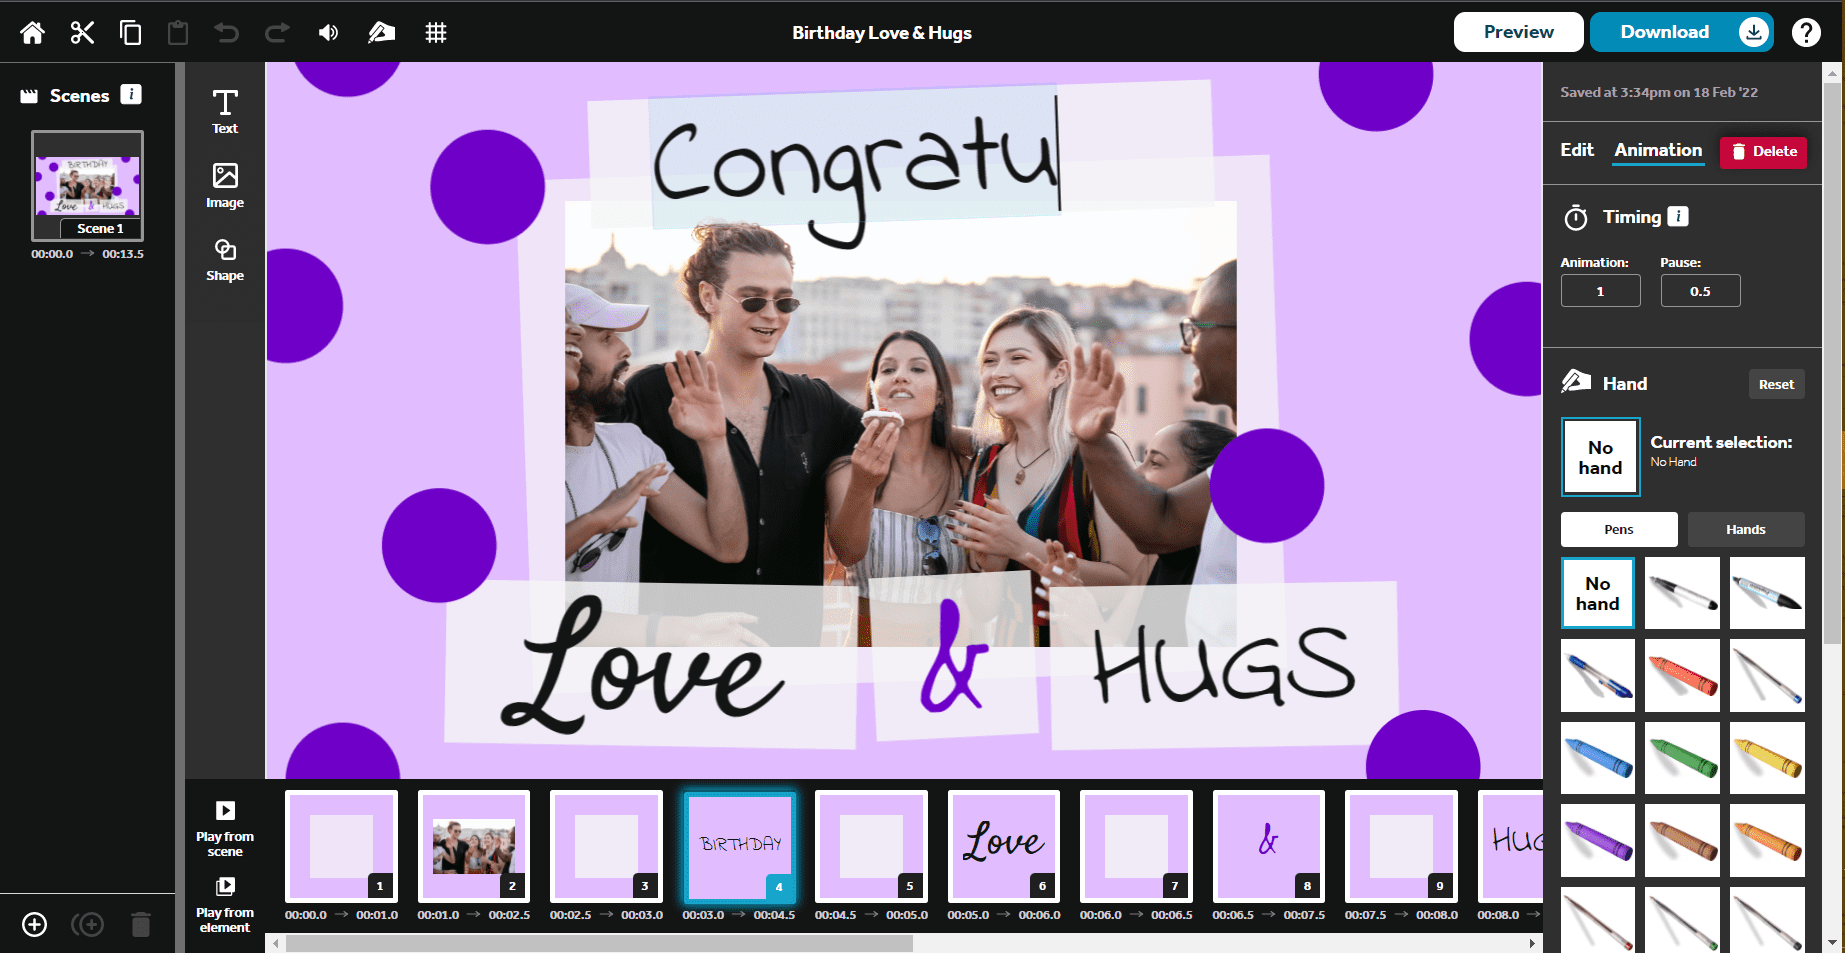
The easiest place to start is with editing the text. All of our templates have example text in them to illustrate where your content would go. So, start working through each text element and editing the content. To change the text, simply double click on a text element and your cursor will appear, allowing you to delete and retype the text as you wish.
You might need to change the size of your personalized text element or move it so that it still fits nicely in the canvas scene. Click once on the text element so that it's positioning box appears and then you can drag the corners to resize it and drag its center to reposition it on the canvas.
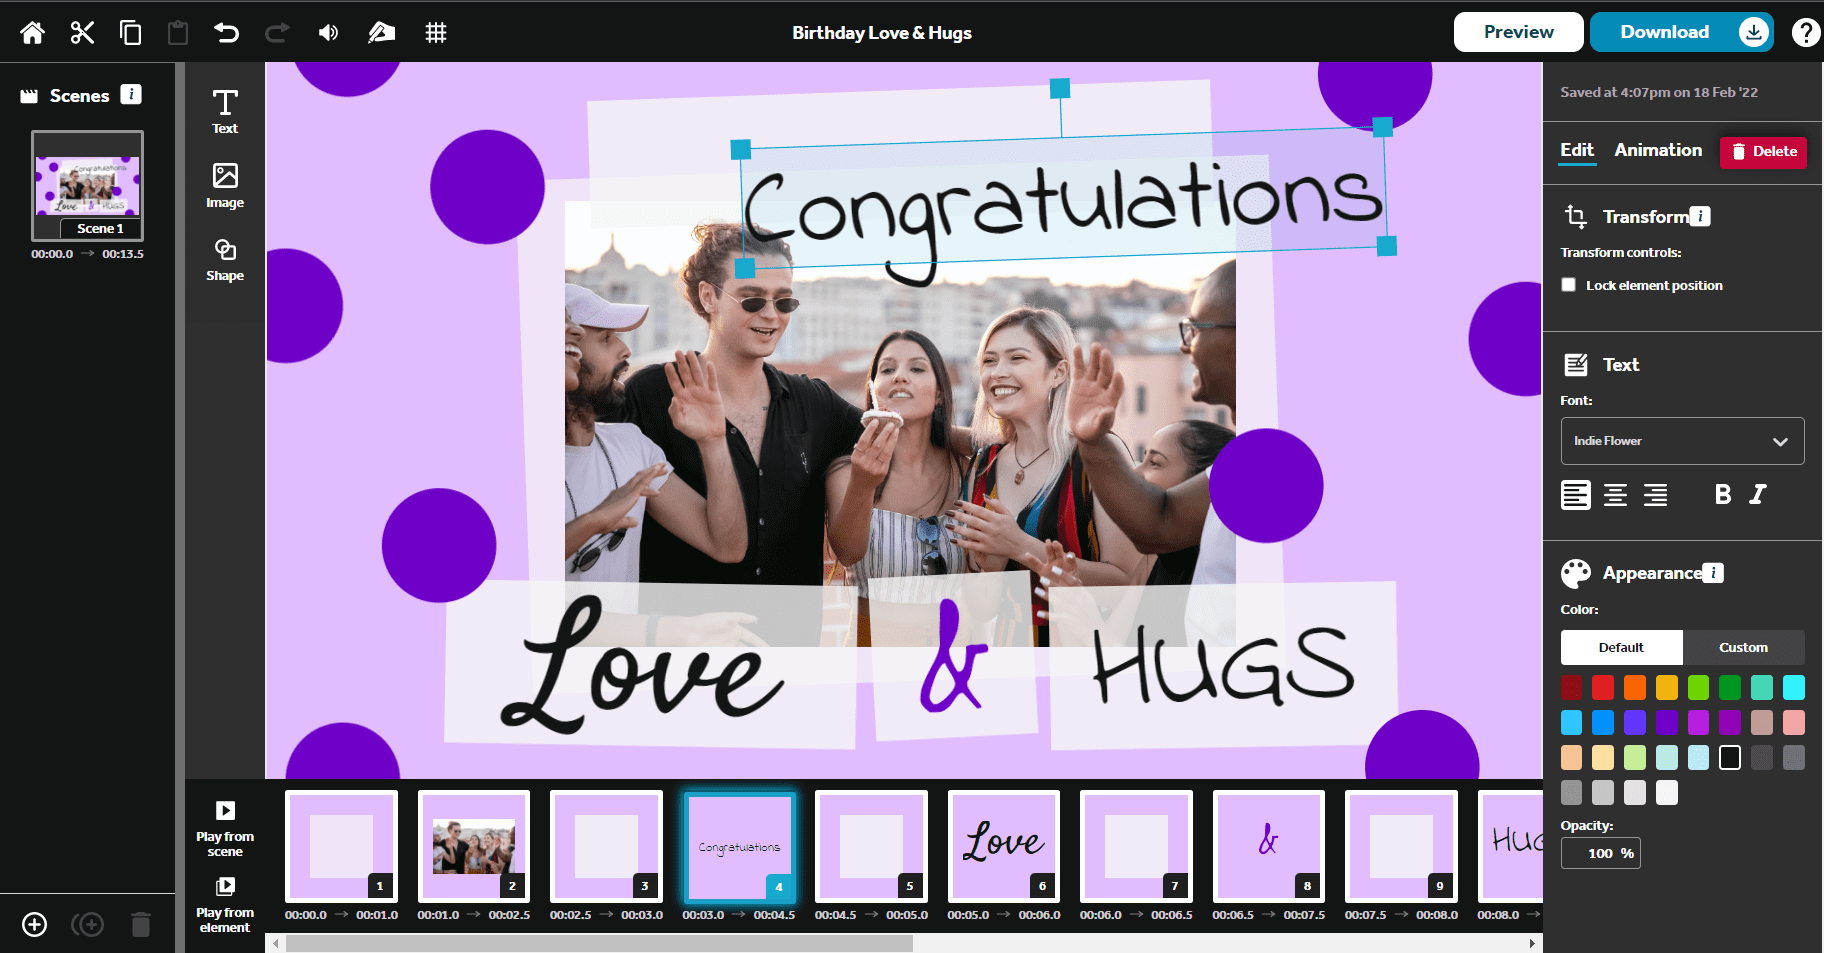
You can even remove a text element if you don't need it by clicking on it and then hitting the red Delete button in the options panel on the right-hand side of the screen.
💡Top Tip 💡Don't forget you can even change the font and color of the text in the options panel on the right-hand side of the screen. So, you can personalize the style of text elements as you go to align with your brand or aesthetic.
2. Add new images and delete old ones
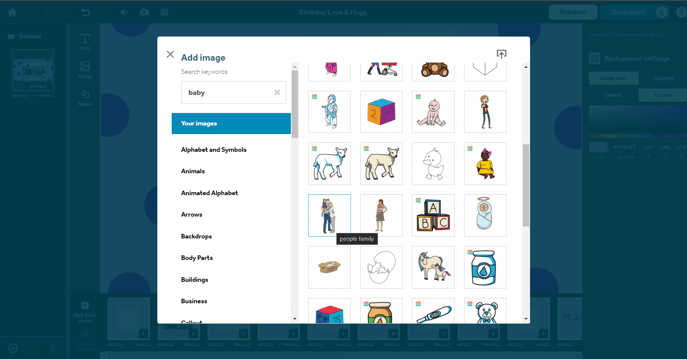
Once your text is in it's much easier to see what images you'll need to support your message. To add a new image, simply click the Add Image icon on the panel down the left-hand side of your canvas and browse through the library of images by searching for a key word or scrolling through the image folders. Click on an image to add it to the template.
💡Top Tip 💡 Don't forget you can upload your own images and photos to personalize the template, just click the Upload icon in the top right of the Add Image window.
To delete an unwanted image from the template just click on it and then hit the red Delete button on the options panel at the right-hand side of the screen.
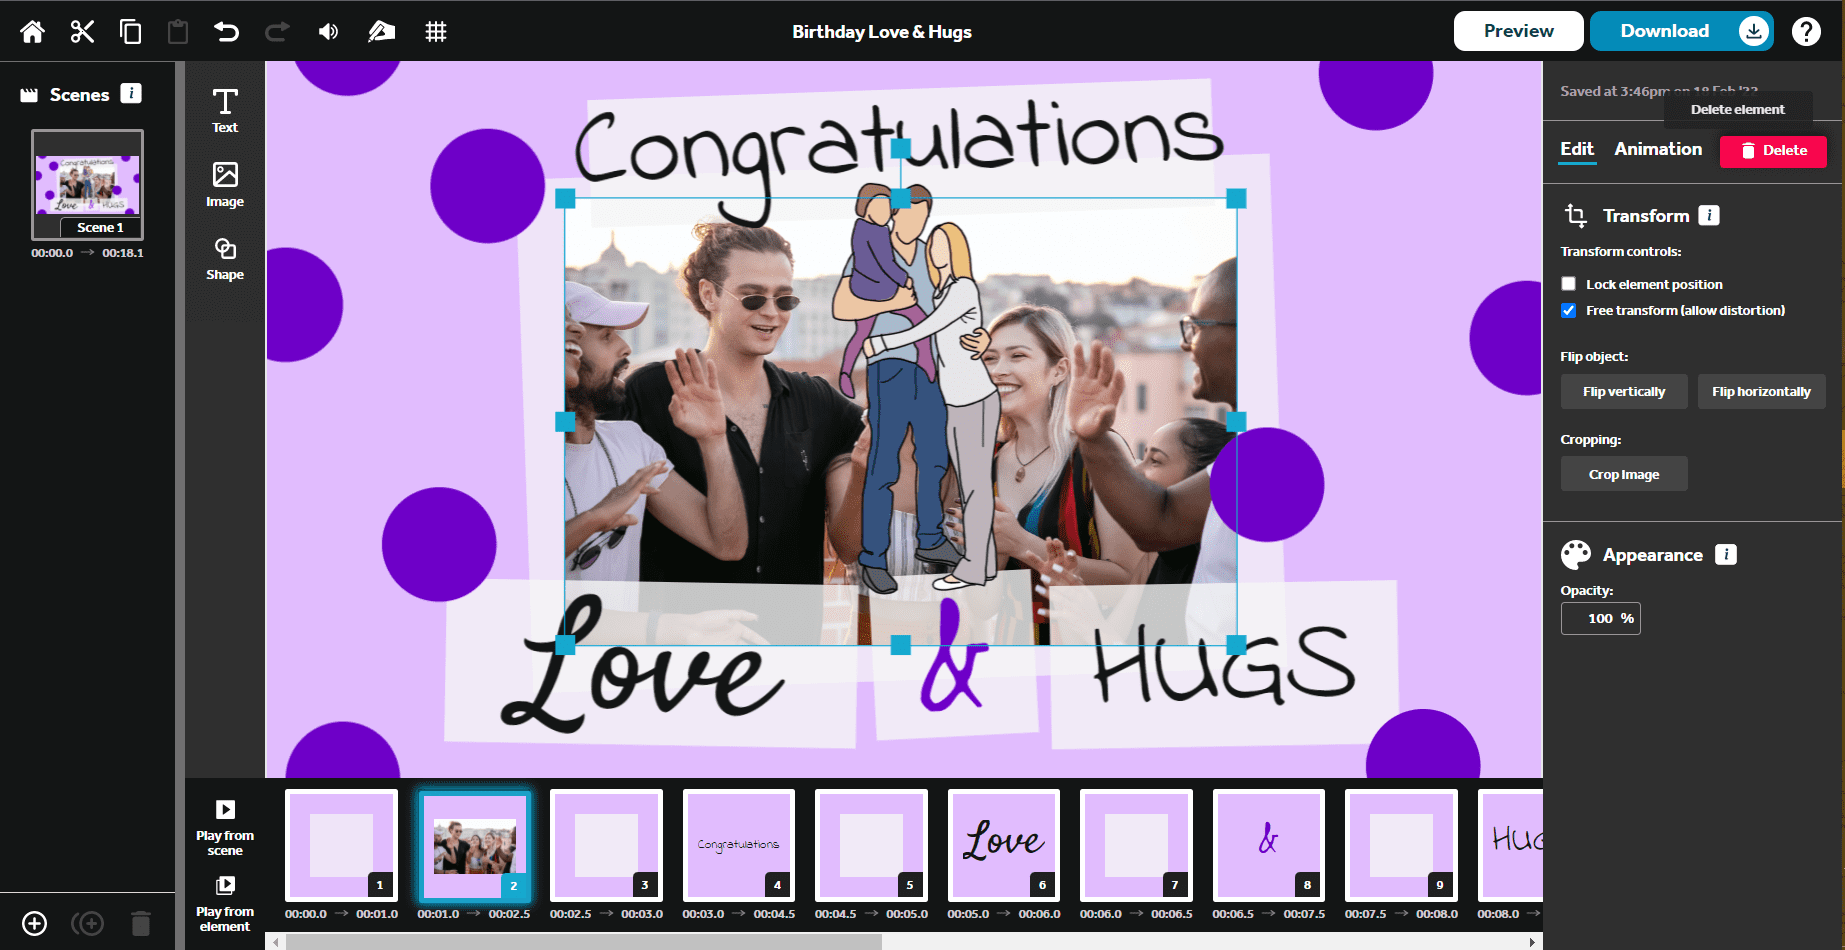
💡Top Tip 💡 If you are replacing the old image with a new image, make sure you remember the position that the old image was in on the timeline at the bottom of the screen. In the example above, the image I'm deleting is in position 2 on the timeline (highlighted in blue). Your new image will appear at the end of the timeline and you will need to drag it along the timeline into the position of the old image.
3. Customize the background and colors
This last step can often have the biggest impact. It's time to switch up the color scheme. You could pick colors that are in line with your brand, suit your message or even just colors that you like.
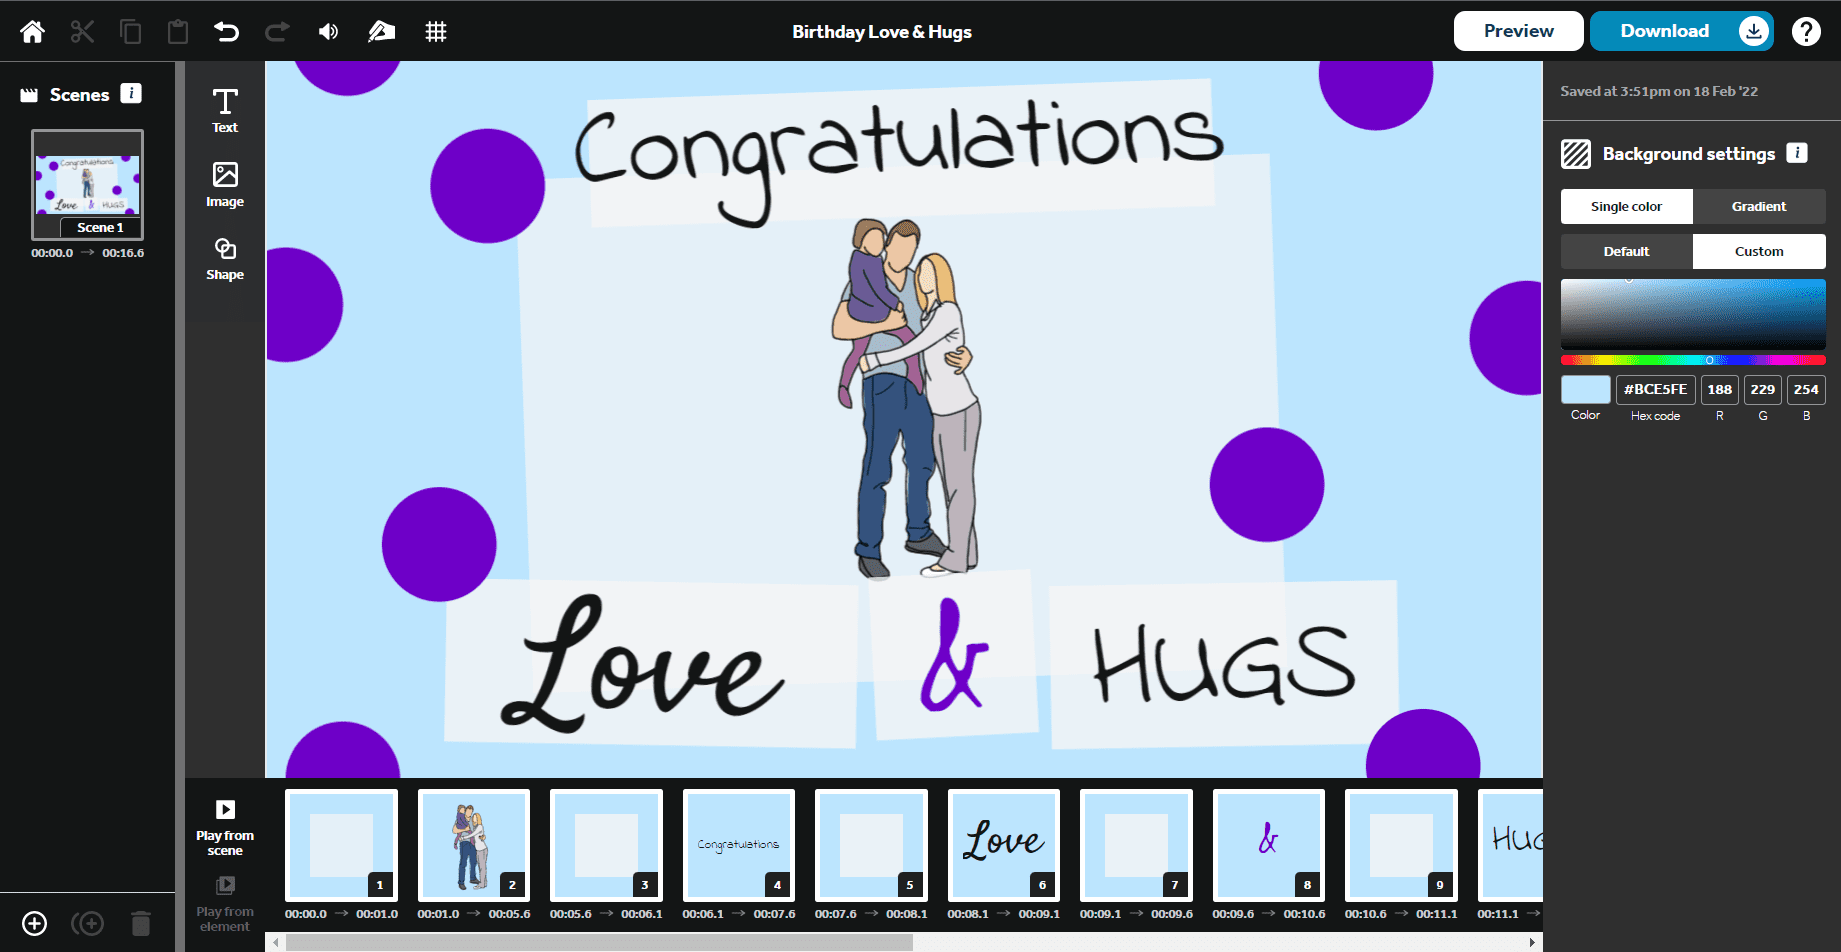
At this point you can edit the background. Click anywhere on the canvas in any space between the elements to open the background options panel on the right-hand side of the screen. Under Background Settings you can choose either a Single Color or a color Gradient for your background. You can then choose colors from the pre-made palette by clicking Default or you can pick out the exact color you want by selecting Custom. You can even enter a Hex code to get your brand colors in.
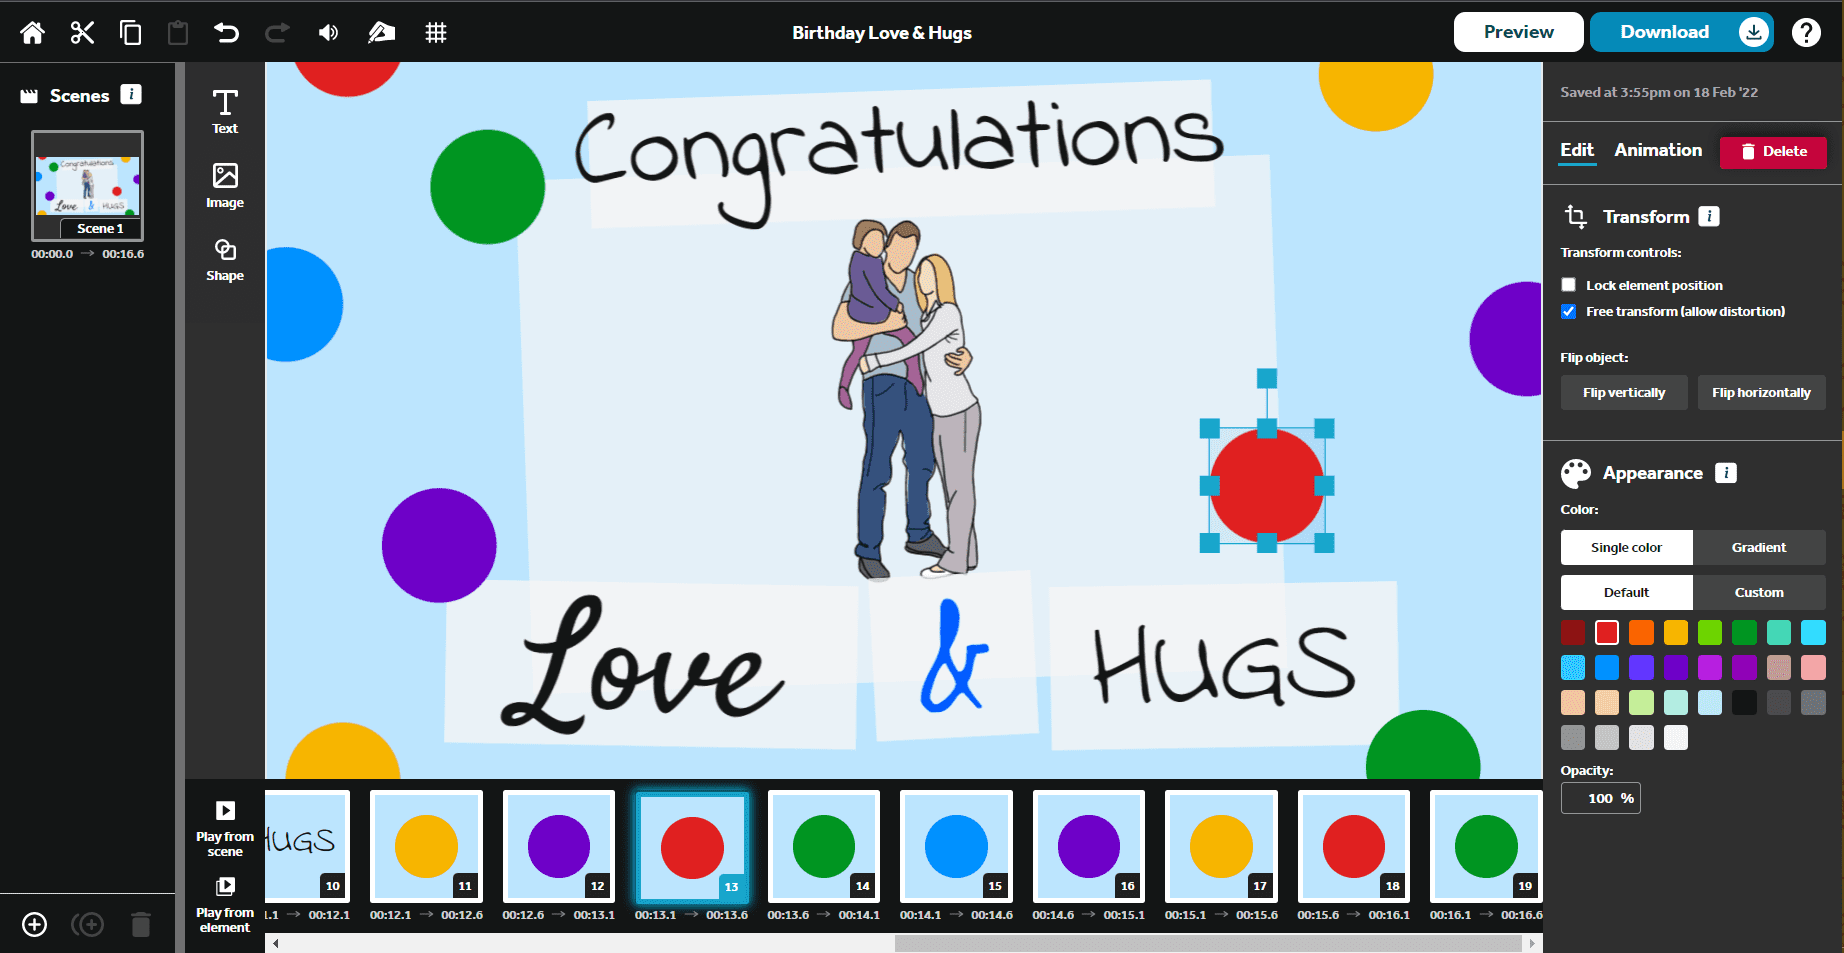
You can edit the color of any text element and many of the image elements in the template to make it your own. Simply click on the element that you want to edit the color of to open its options in the panel on the right-hand side of the screen. The Appearance options let you select a new color exactly like you did for the background.
💡Top Tip 💡 You can search for images by category and by typing key words into the search bar. If you're looking for something specific, it's often easier to search for words rather than by category. But if you're just looking for ideas, browsing the categories is a great way to start.
3. Customize the colors and background
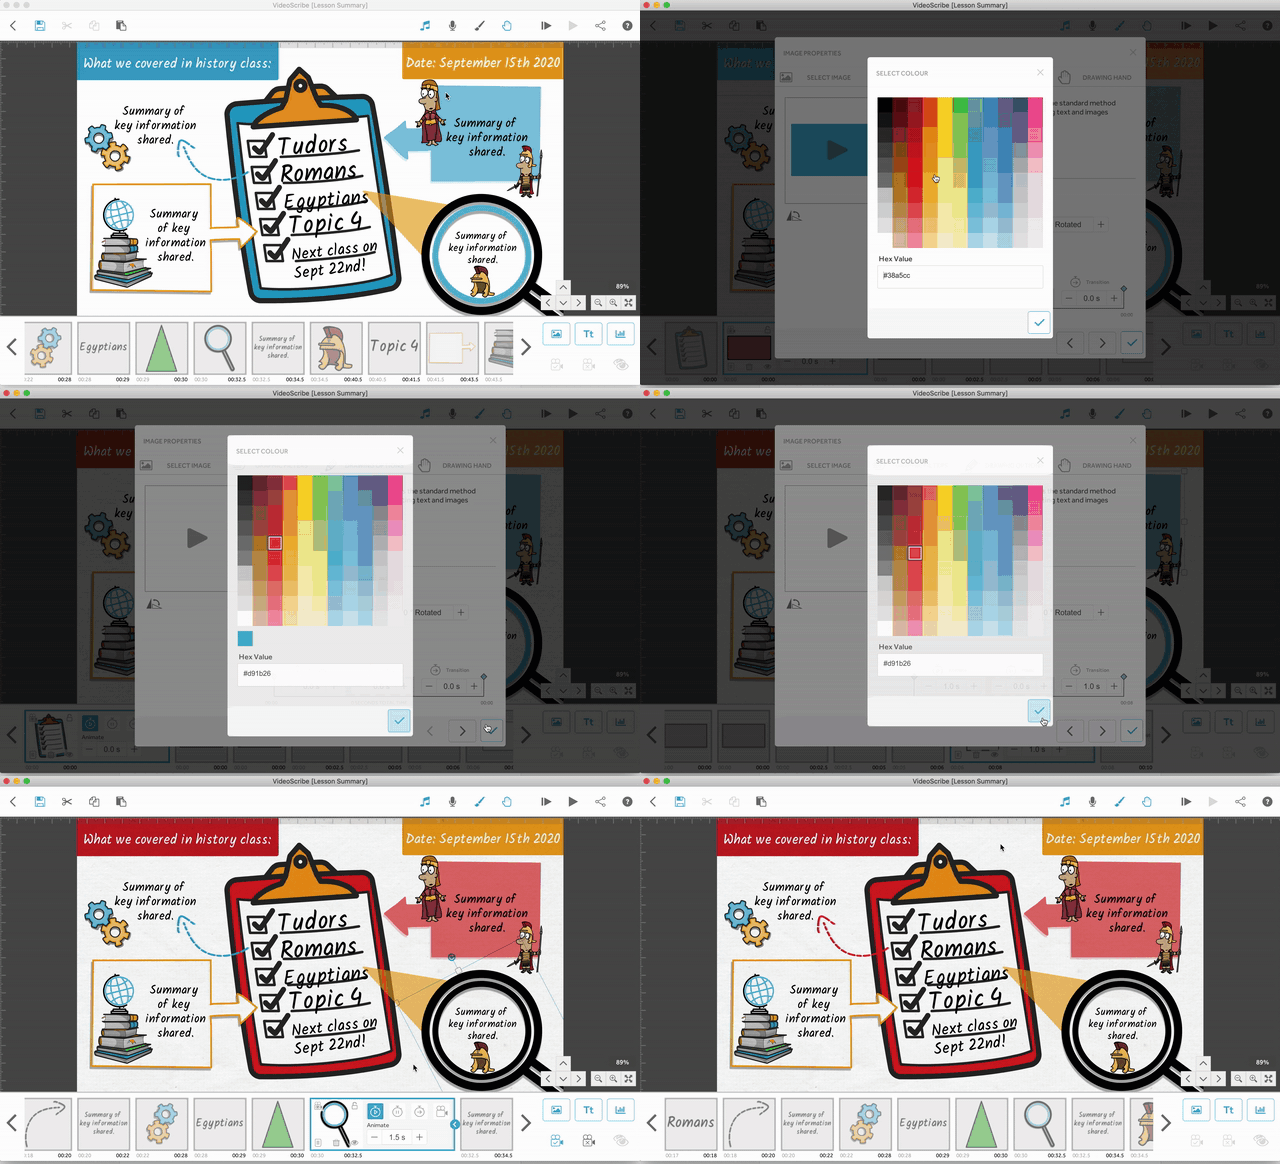
This last step can often have the biggest impact. It's time to switch up the color scheme. You could pick colors that are in line with your brand, suit your message or even just colors that you like.
Lots of the images in the VideoScribe library are color changing so all you need to do is open their properties and select the color you want. To get an exact match with your brand colors, type the color hex code into the 'Hex Value' option.
At this point you can also edit the background. Some of our templates already have a background texture or image while others like the one above are plain. By clicking the paint brush icon in the top right hand corner, you can pick from a range of background colors and textures including paper, chalkboard and marble.
To start customizing our templates simply log into VideoScribe and click the 'Template Scribes' button, or start a FREE 7-day trial today (no credit card needed).


.png)

![How to create animation magic [3-part guide to video success]](https://blog.videoscribe.co/hubfs/How%20to%20create%20animation%20magic%20guide%20VideoScribe.png)


COMMENTS