
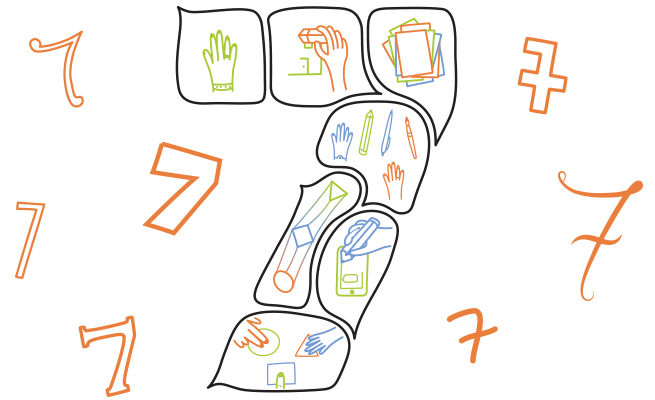
 Even if you're just starting out, it's easy to make use of the cool tools VideoScribe has to offer. Here's a list of the best VideoScribe features that you can start using in your scribes today. This is the tenth article in a series that teaches you how to make powerful and unforgettable scribe videos. See the end of the post for more. So you've mastered the basics of scribing – now what? These 7 stylish tricks will give your scribes the wow factor they need to get noticed. Learn how to morph, move in, mix things up and get your (own) hands dirty.
1. The slow reveal
 Scribing's biggest asset is that people are naturally inquisitive and want to know what is going on. If you like drawing yourself, you might be familiar with the sensation of someone coming up behind you to peek over your shoulder. Build tension by increasing the drawing time of your images. Let your audience try to work out what is being revealed. Use this quirk of human nature to communicate a strong message while entertaining your viewers.
2. Mixing hands, pens and lines
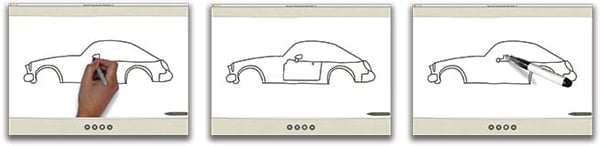 In VideoScribe you'll find a huge range of different pens, pencils, erasers and other things, as well as a variety of different drawing hands. If your scribe is about primary education, why not use coloured pens to brighten it up? Or perhaps choose a child's hand to draw your images. You could use a chalk pen and black background to make it look like you are drawing on a blackboard. Alternatively, it can be powerful to take the hand away completely and just have the line draw itself. The effect focuses even more sharply on what is being written. However subtle, customised visual clues like these will make your scribe look more put together.
3. Erase your scribe
 VideoScribe has a variety of eraser hands for you to use. Along with the 'scribble out' image, found in the 'shapes' library, you can make it look like your images are being erased from the canvas completely. This tool is particularly handy if you're trying to show how rubbish an old idea or ways of doing things is. You can erase the offending image or text before overlaying with the your new, better product or idea.
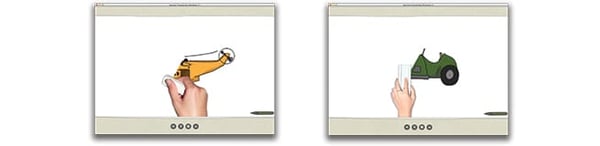
4. Morphing
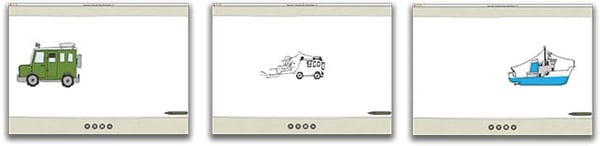 The morphing tool makes your scribes come alive. Use it to turn one image into another – you'll see the first image break apart before re-forming as an entirely new image! Your audience won't be expecting it, so it's a good way to keep the viewer on their toes. Here's how to morph images: in the timeline, select the image you intend to morph to, click the 'morph' option and pick the image you want to morph from. You can either choose for the first image to disappear as it morphs or have the second image come from it. Sit back and watch the magic happen.
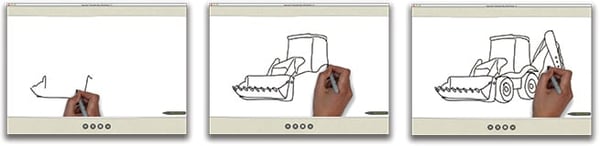
5. Moving in
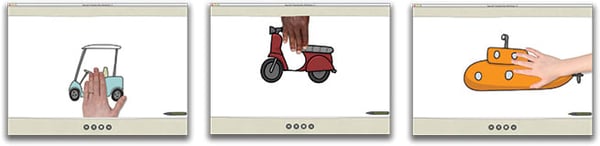 If you need to communicate an idea quickly, or demonstrate how several things piece together, why not try using one of the many move-in hands in your scribe? For a longer scribe, moving in can make a refreshing change from drawing. Just place some of the images onto the canvas, select your preferred hand and choose from which angle you want it to appear onscreen.
6. Use your own hands
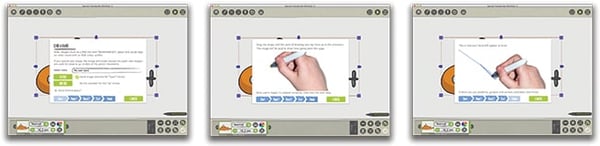 If you're a serious scriber you might like to personalise your scribes by having your own hand doing the drawing – it's more personal than a logo! Take two photos of your hand holding a pen or pencil, in the position you would adopt if you were really going to draw something. There should be a slight movement between the two photos, but not too much. Cut out the hands in Photoshop or free software Gimp and save them as transparent PNGs so there's no background. You then need to go to the 'hands and pens' menu in the options drop-down in VideoScribe. Select 'new' and follow the instructions to upload your hand. Congratulations, you can now watch yourself draw in all your future scribes.
7. Change the paper
 Something that not many people change in their scribes is the paper colour or texture. In the VideoScribe options menu at the top of your screen, you can select the paper option and make the canvas of your scribe any colour you want. Changing to the paper texture as well can make your scribe look more tactile. Play around a bit and see what kind of effects you can achieve – you might be surprised by the difference it makes. Have any tips and tricks of your own? We'd love to hear them. Share your ideas with the Facebook community. More expert advice from the Better Scribes series:
- How to give your scribe a heart
- Captivate your audience with these pro colour tips
- How to record a professional sounding voiceover
- The layout lowdown from a design expert
- Why forgetting fonts is a big mistake
- 4 Easy ways to find original images for VideoScribe
- Are you guilty of these amateur timing mistakes?
- The secrets to ridiculously persuasive scribing
- How to hit the right note with scribe music
- 7 Clever tricks seasoned scribers swear by
.png "VideoScribe")


![How to create animation magic [3-part guide to video success]](https://blog.videoscribe.co/hubfs/How%20to%20create%20animation%20magic%20guide%20VideoScribe.png)
.jpg)


COMMENTS