Warning: We’ve been heavy-handed with the GIF representation in this blog. Prepare yourself for GIPHY goodness... we're just so excited to shout about our advanced timeline improvements!
So… you’ve been looking for what’s new in ‘VideoScribe for your browser’. Look no further!

Just when you thought the advanced timeline couldn’t get greater… we’re excited to announce the addition of audio visualization alongside your elements.

No jokes. No lies. 100% facts. Now, when you use the advanced timeline in VideoScribe for your browser, you can organize your elements and animations in time with your audio and voice-over tracks. Why? So you can easily visualize both background audio and voice-over tracks on separate lines within the timeline.
And in this blog article, we’re going to show you three ways that you can make the most impact with your animated videos by leveraging this functionality.

Maximum impact with a strong beat
This is one of our favorite ways to create videos that maximize the advanced timeline. Once you've found your perfect audio track, you can time the elements to appear on the beat to create an impactful experience for your viewer. Check out our short but sharp example below:
💡Tip: Make sure you have sound on!
So how did we achieve this? Let's chat it through. In the screenshot below, you can see the audio track line at the base on the timeline view. Using the peaks of the music as the guide, we've timed our animations to appear as the drums (in this case) kick in.
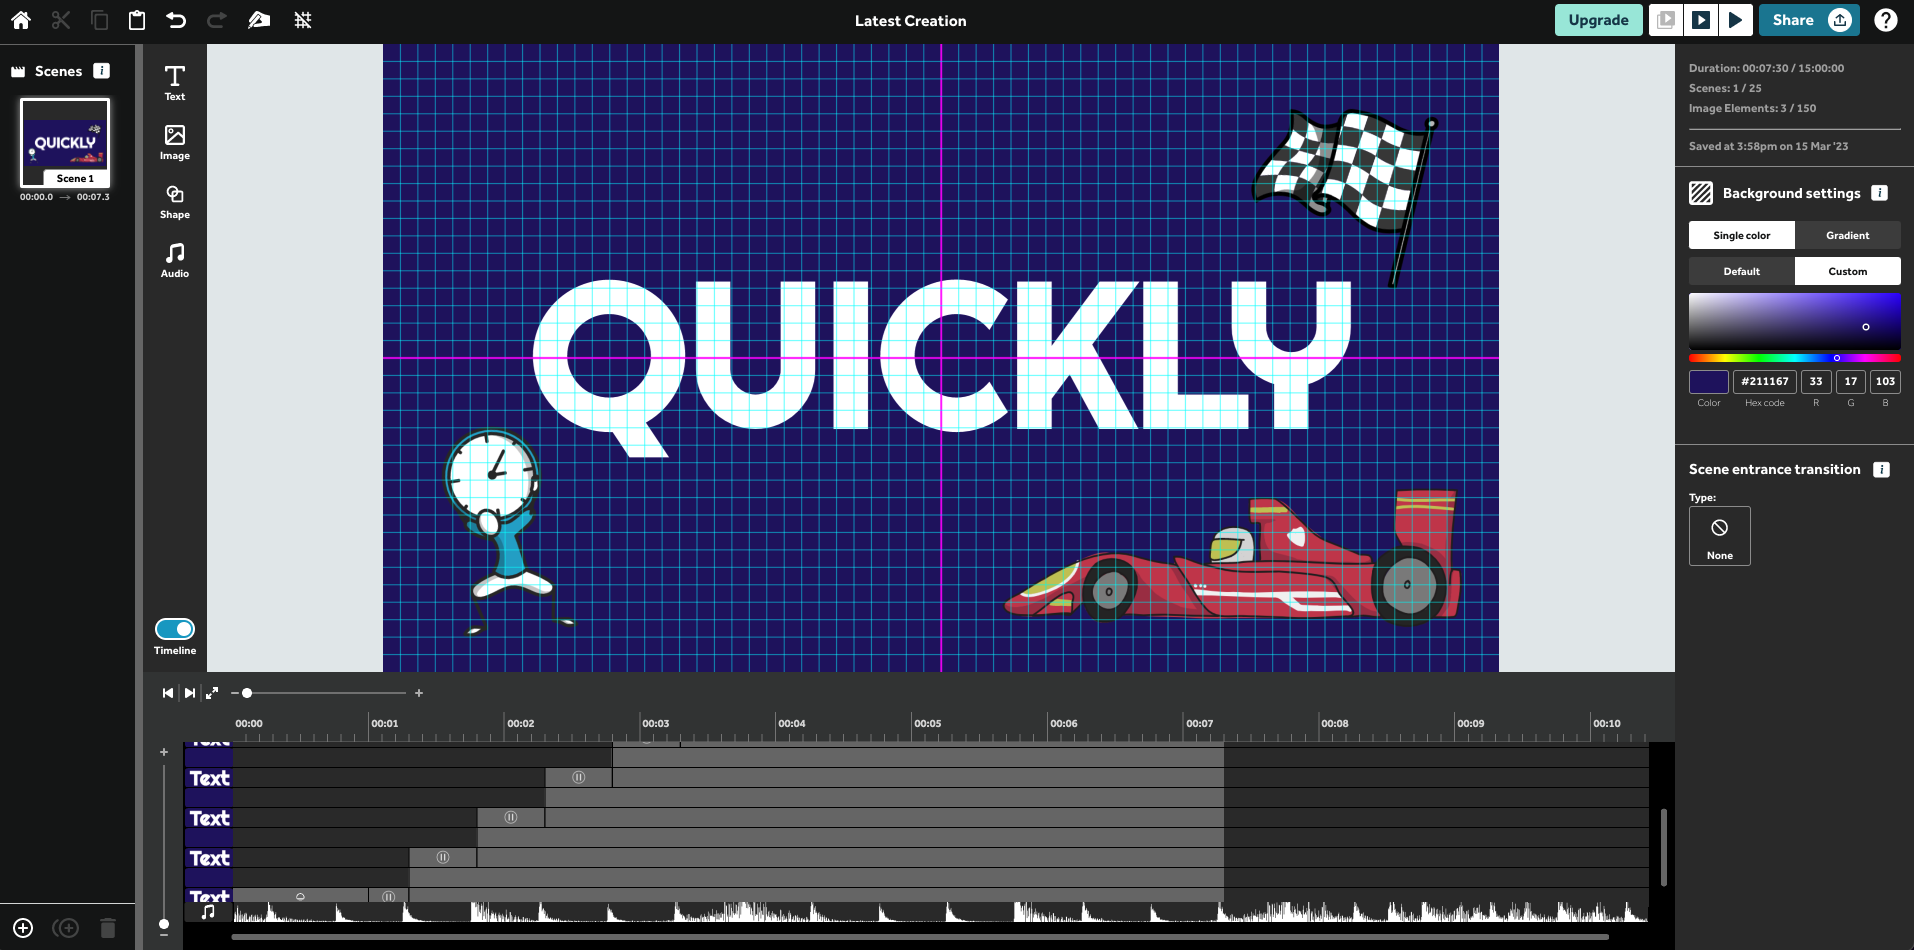
For even more impact, we removed any animations on the elements - meaning they would simply and sharply appear - but increased the pause time to line up with the drum beats. It's an incredibly simple but effective way to create impactful videos.

Time characters to appear with the voice-overs
The most obvious example here would be to time your animated characters to appear when voice-overs start, and for the characters to disappear when the voice-overs stop. This gives off the impression that the animated character has the 'voice'.
But rather than showing you an exact example of that, we wanted to be quirky. We wanted to be funny. We created an example... using ducks. Yep. Ducks. It's simple, it's quick, it's really ducking good 🐣 Check it out:
💡Tip: Make sure you have sound on!
Like with the impact example, we paid close attention to the audio peaks on the advanced timeline. The ducks appeared as their voices played, giving off the feeling that they were talking at the same time.
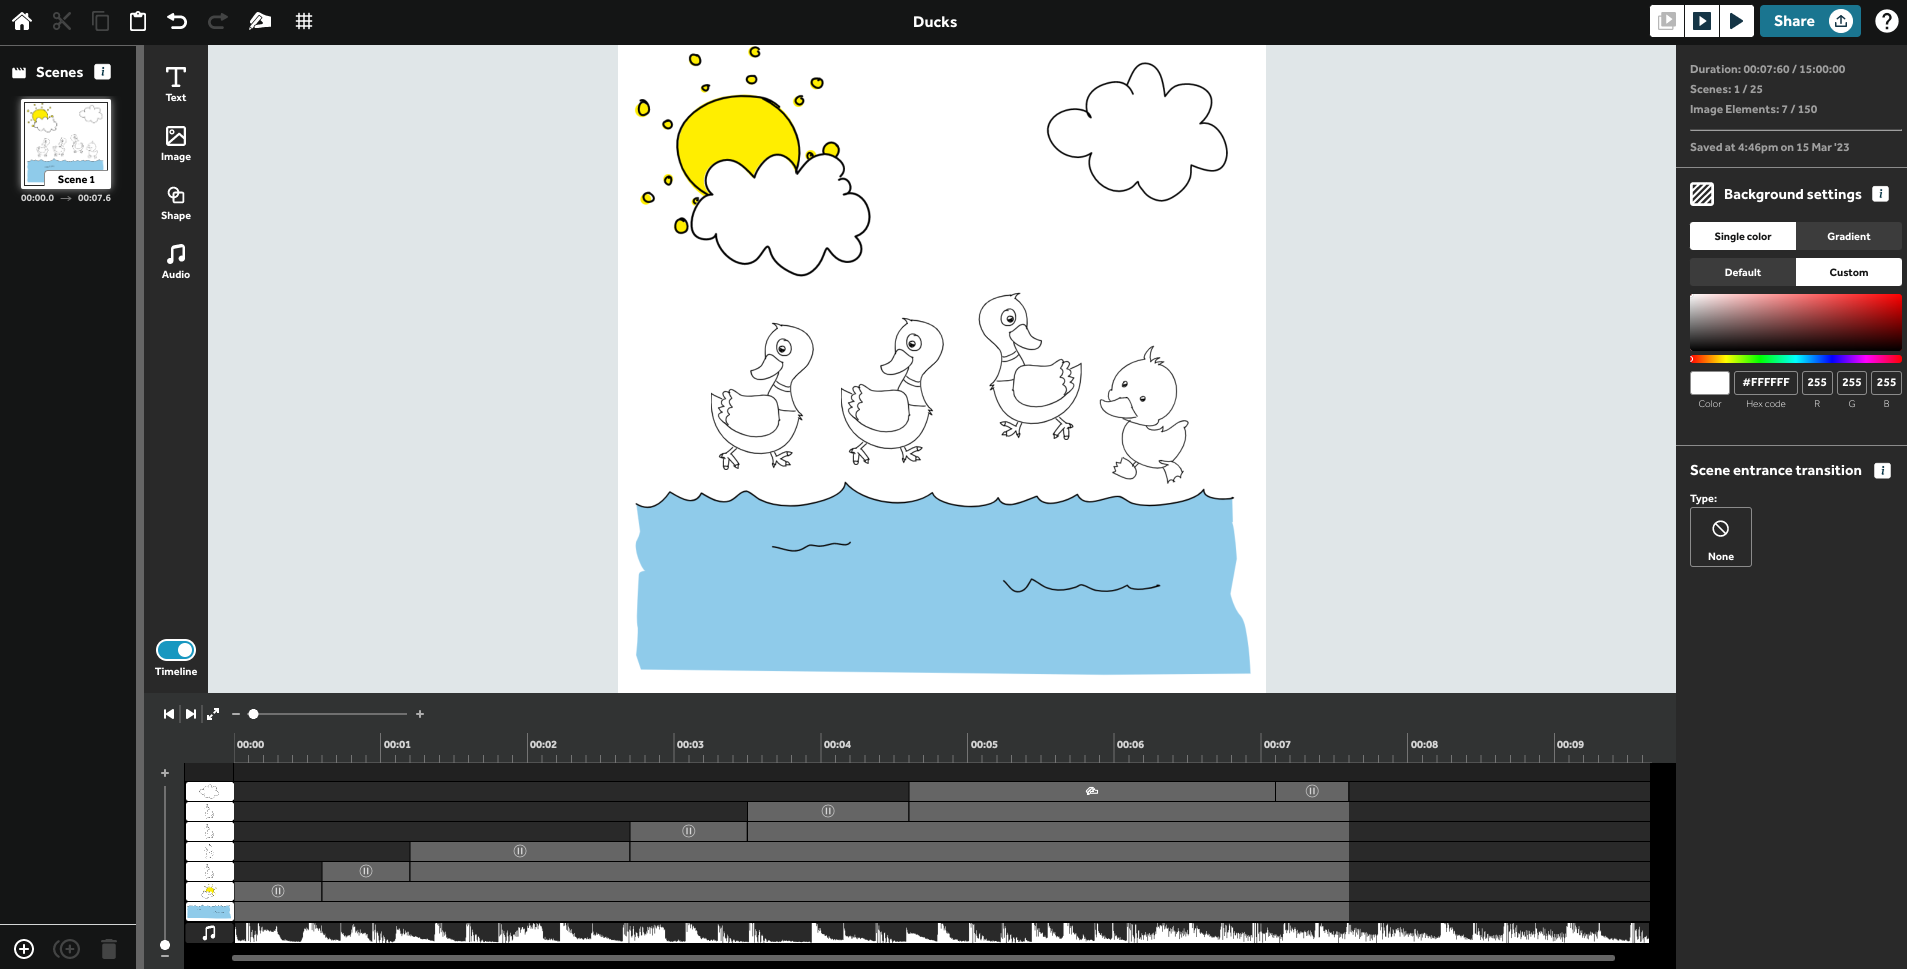
Because there was some accompanying background music with each duck quack, it did make it a little more fiddly. But, once we identified the ducks quack at the higher frequency, we were able to pin point when the next duck would appear... giving us the finished example!

Moody transitions
In this example, we're looking at how you can pair the VideoScribe's scene transitions with your audio track to create moody transitions. Ooooo... 👀 Check out what we mean in our example below:
We started off by listening to the audio and choosing scene transitions from VideoScribe that we felt best matched it. In this case, we went with 'Slide in' and 'Bounce'.
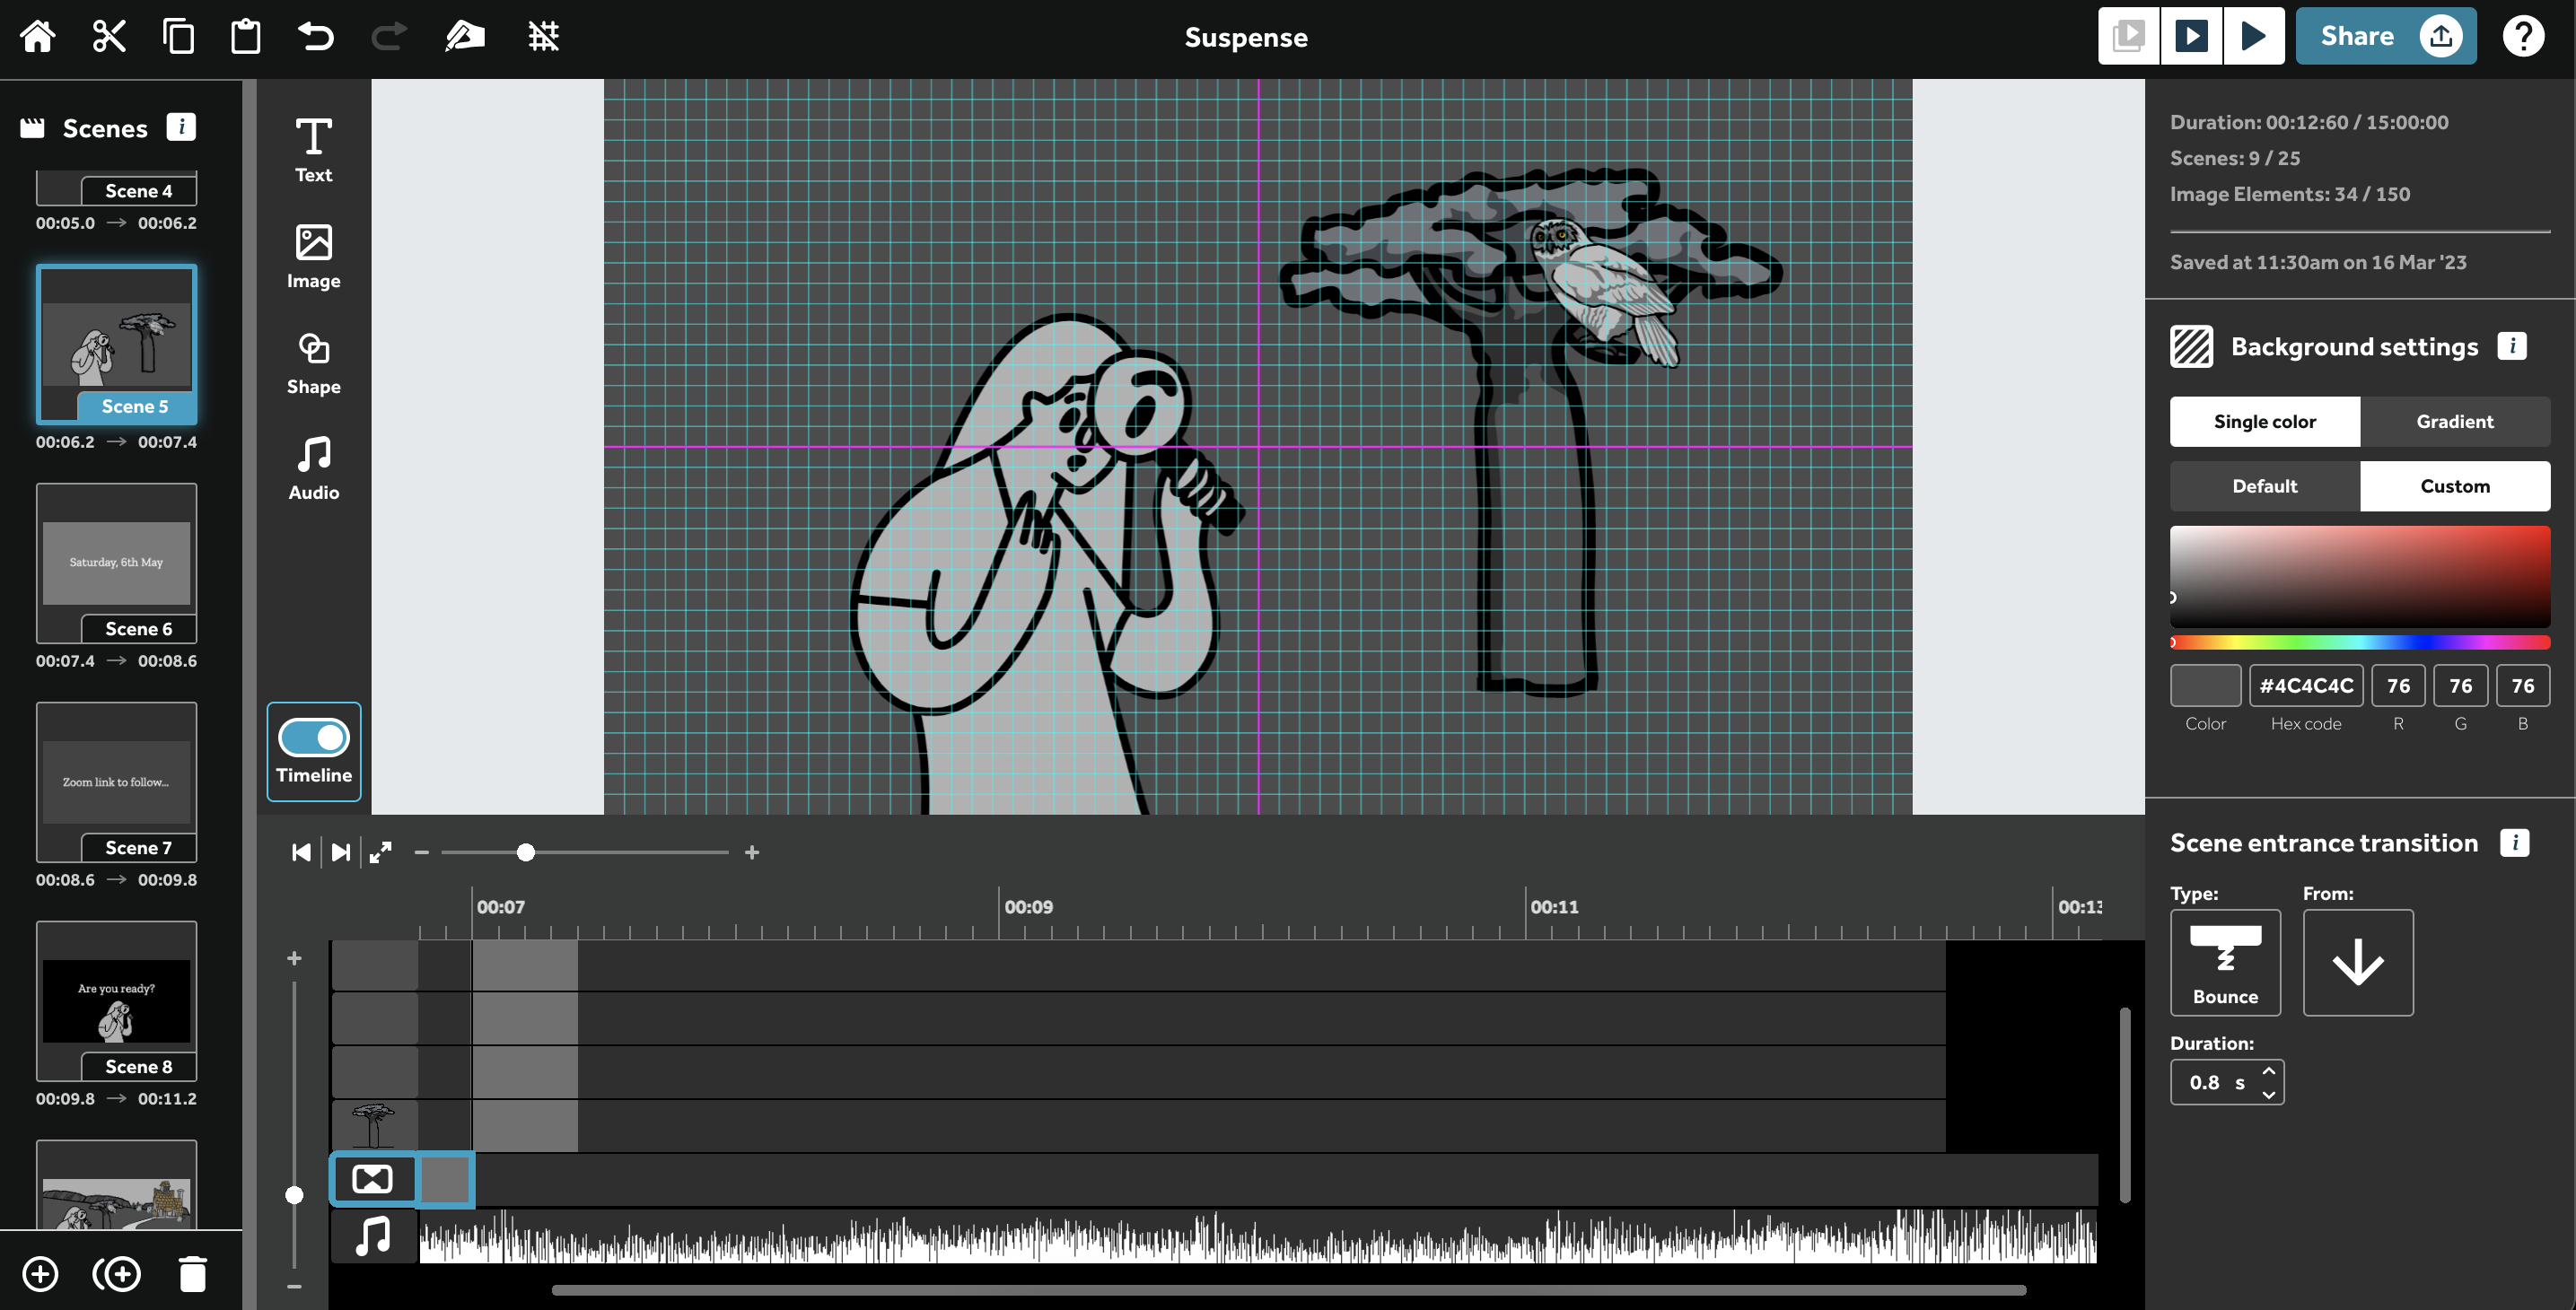
Then, looking at the audio track in the advanced timeline, we timed the scene transition as the audio peaks formed and disappeared. We then adjusted the duration of the transition - in the screenshot above, using 'Bounce' - to match the audio marks. And boom... the rest is history!

So there we have it. That’s just three ways that you can use the advanced timeline to easily create show-stopping animated videos! And don’t forget, if you want to make it easier on yourself, you can always choose to get started with a video template. You'll be pushing out animations like a professional in no time!

Happy animating.


.png)


![How to create animation magic [3-part guide to video success]](https://blog.videoscribe.co/hubfs/How%20to%20create%20animation%20magic%20guide%20VideoScribe.png)
.png)


COMMENTS